Pooling User Guide

Step-by-Step Instructions for ThorBlock Pooling
-
Select ThorBlock
-
Getting Started
Step 1: Login/Register
SafeID
You will need a SafeID account to make use of ThorBlock services. SafeID is the identity-, access-, and payment-management system for all Safe Haven solutions. If you already have a SafeID account, click Login in the top-right corner and proceed with Step 2. The first time you log in, you will be asked to grant ThorBlock access to your SafeID email address and user profile. Click Yes to continue.
-
If you haven’t yet created a SafeID account, click Register in the top-right corner.
-
Enter the correct information in the required fields and click on Register to finish creating your account.
-
Once created, an account verification email will be sent to the email address you provided.
-
Click the verification link in the email to verify your account.
-
Your account should be successfully created and you will be taken to your account Dashboard where you can proceed with the following step.
Step 2: Choose a Wallet Provider
https://www.thorblock.io/account/
First Time Login
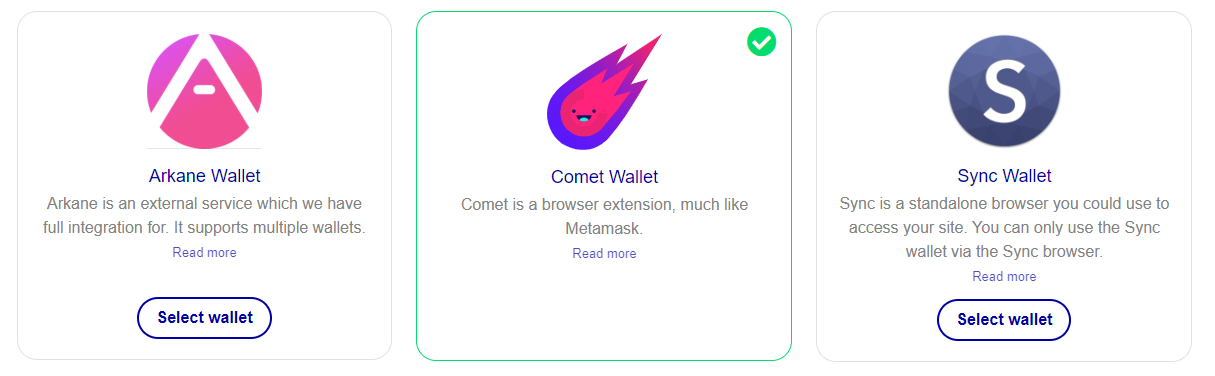
If this is your first time logging in, you will be taken to your account Dashboard where you are able to select a wallet provider. Currently, ThorBlock only works with VET wallets. ThorBlock gives users the option to choose between three different wallet providers: Arkane, Comet, and Sync.
Arkane Wallet
Arkane Network is an easy-to-use blockchain wallet provider that offers support for multiple blockchains.
To select Arkane as your wallet provider, follow these steps:
-
On your ThorBlock account Dashboard, select the Arkane Wallet option. A notification will appear with the message “Wallet provider saved”.
-
In the My wallet(s) section below, you’ll have to sync the available Arkane wallets. To do this, click the Synchronize wallets button.
-
A pop-up will appear where you can log in to your Arkane Network account. If you already have an Arkane account, log in and continue with the next step. If you haven’t yet created an Arkane wallet, click Create Account and perform the following steps:
-
Sign up with your Google account, Facebook account, or enter your desired account details and click the Create Account button.
-
Read and the Terms & Conditions and click Accept.
-
Complete the email verification step.
-
When Arkane Network asks for access to ThorBlock, click Allow.
-
Arkane will ask you to set up a master PIN for your account. Enter a PIN of 4-6 digits and continue to finish creating your Arkane account.
-
Arkane will ask you to create a new VET wallet or will create one for you within 5 seconds.
-
The pop-up will close once a wallet is created.
-
In the drop-down menu of the My wallet(s) section of the ThorBlock page, click the Arkane wallet you would like to use for ThorBlock.
-
You can access your Arkane wallet at https://app.arkane.network. Here you can also manage your tokens or import an existing wallet.*
-
Once your wallet has the required VTHO and SHA tokens, you are ready to fund a project or create your own. Continue with Step 3.
Comet Wallet
warning
We still encounter occasional issues while using the comet wallet (eg: when you want to make revoke contributions or cancel pools etc.) and have communicated these issues to Totient, as they have to solve this.
Comet is a Chrome extension that provides a decentralized browser-based cryptocurrency wallet for the VeChainThor blockchain.
Comet
Before you can use Comet as your wallet provider, you’ll need to install the Chrome extension. You can download the Chrome extension here. Once you have installed the extension, you will have to create a wallet and fund it with tokens.
-
Open the extension in your Chrome browser
-
If you already have a Comet wallet or would like to import an existing VET wallet:
-
Click Existing User
-
Read the Terms of Use and click I Accept
-
Set a 4-digit PIN and confirm the PIN
-
Enter the seed words of the wallet you would like to import and click Restore.
-
If you do not have a Comet wallet yet:
-
Click New User
-
Read the Terms of Use and click I Accept
-
Set a 4-digit PIN and confirm the PIN
-
Click View Recovery Seed
-
Write down and store your 12 seed words in a secure place - do not lose these!
-
Press the checkmark icon (✔) to finish creating your wallet.
-
To fund your Comet wallet, click Deposit in the Comet extension and send your tokens to the provided address.
Comet
Comet only supports the sending of VET and VTHO. However, you can still send other tokens to this address. If you want to see and manage tokens other than VET or VTHO in your Comet wallet, you can use the MySafeWallet web interface made by Safe Haven at https://mysafewallet.io.
-
To select Comet as your wallet provider, follow these steps:
-
On your ThorBlock account Dashboard, select the Comet Wallet option. A notification will appear with the message “Wallet provider saved”.
-
In the My wallet(s) section below, you’ll have to sync the available Comet wallet. To do this, click the Synchronize wallets button.
-
A Comet pop-up will appear asking to allow ThorBlock to view and save the current Comet address. Click Confirm.
-
Once your wallet has the required VTHO and SHA tokens, you are ready to fund a project or create your own. Continue with Step 3.
Sync Wallet
Sync is the official desktop wallet and dApp browser of the VeChainThor blockchain. Sync is available on Windows, MacOS, and Linux.
Sync
Before you can use Sync as your wallet provider, you will need to install the desktop application, which can be downloaded at https://env.vechain.org.
-
Using Sync as the wallet provider is only possible in the Sync browser. Once you have installed Sync, you will have to create a wallet and fund it with tokens.
-
Open the Sync application
-
Click on the Wallets icon to the right of the address field to open the Wallets page.
-
If you want to import an existing VET wallet:
-
Click the Import button
-
Choose to import your wallet by keystore, mnemonic words or private key and enter the required information. Click Next.
-
Give the wallet a name and a password and click Import.
-
If you want to create a new VET wallet:
-
Click the Create button
-
Give your new wallet a name and a password and click Next.
-
Write down and store your 12 mnemonic words in a secure place. Do not lose these! If you have correctly stored your mnemonic words, click Next.
-
Confirm your mnemonic words by selecting them in the right order and click Next.
-
You have now successfully created a wallet in Sync!
-
To fund your Sync wallet, select your wallet on the Wallets page and send your tokens to the provided address.
Sync Support
Sync currently only supports the sending of VET and VTHO. However, you can still send other tokens to this address. If you want to see and manage tokens other than VET or VTHO in your Sync wallet, you can use the MySafeWallet web interface made by Safe Haven at https://mysafewallet.io.
-
To use Sync as your wallet provider, follow these steps:
-
Open ThorBlock in your Sync browse. You must open ThorBlock within the Sync wallet’s embedded browser.
-
On your ThorBlock account Dashboard, select the Sync Wallet option. A notification will appear with the message “Wallet provider saved”.
-
In the My wallet(s) section below, you’ll have to sync the available Sync wallets. To do this, click the Synchronize wallets button.
-
A pop-up will appear asking to allow ThorBlock to view and save the selected Sync address. Select the wallet you want to use and click Next.
-
Enter the wallet password and click Sign to complete the signature request.
-
Once your wallet has the required VTHO and SHA tokens, you are ready to fund a project or create your own. Continue with Step 3.
Step 3. Creating a Pool
https://pooling.safetech.io/create-a-pool/
- To create your own pool, click on Create a Pool on the menu bar at the top of the page.
Min SHA holding requirements
To be able to create a pool you need a VET wallet that holds at least 25k SHA. See this Medium article for additional token holding requirements. Additionally, to create a pool you will need at least 6.5k VTHO in the same wallet. Before you follow these instructions, make sure you have a wallet linked and funded with the required tokens.
-
On the Create a pool page, you will first have to set the funding method. This includes which token you want to pool and the amount of tokens you want to pool. The funding method can't be changed after you have created the project.
-
In the drop-down menu under VeChainThor Wallet, select the wallet from the wallet provider you have chosen to use. This wallet will be the admin wallet and will need to be funded with at least 25k SHA and 6.5k VTHO.
-
In the drop-down menu under Funding Token address, choose the token you want to pool.
-
In the field under Net amount, enter the total amount you want to raise in the token of your choosing.
-
Once you have entered the total amount you want to raise, the field under Total amount will show the total amount of tokens that will need to be contributed to entirely fill the pool. This includes the ThorBlock’s fee of 1% (this fee is taken directly from contributions, meaning if a user contributes 100 tokens, 99 tokens will go to the pool).
-
In the field under Minimum per contributor, enter the minimum amount of tokens that a contributor can contribute to your project.
-
In the field under Destination address, enter the address that you want to distribute the pooled funds to, such as the ICO/crowdsale address in the case of an ICO/crowdsale. This address will be listed on the pool page and can be a way for contributors to verify whether their contributions will end up in the right place. This field is not required. It can be left open or changed at a later time.
-
Check the Lock destination address box if you want the destination address to be locked. This can be used to guarantee contributors that their funds will be sent to the correct address. If left unchecked, you will be able to change the destination address at a later time. (This option is only available if a destination address is given)
-
Check the Enable whitelist box if you only want to allow contributions from a list of whitelisted addresses. These addresses can be added after the pool is created. This can be useful in the case where you only want to allow contributors that have met certain external conditions (KYC, country restrictions, etc.) to contribute to your pool.
-
Click the Deploy pool contract button at the bottom.
-
A pop-up window from your selected wallet provider will open and ask for confirmation of the transaction that will create the pool for your project.
-
Confirm you are using the correct admin wallet.
-
Make sure that the amount of VTHO in your wallet covers the (max) fee needed for the transaction. Do not lower the (max) fee as this may cause the transaction to be reverted.
-
If using Arkane as your wallet provider, enter the PIN you set for your Arkane wallet.
-
Click Confirm or Next.
-
If using Sync, enter your wallet password and click Sign.
-
Once you have completed these steps a message will appear that a pool will be created for you. You can check the status of your pool creation transaction by clicking the link in the message.
-
Once the transaction is completed, your pool has been successfully created!
-
You can view your newly created pool by going to your Dashboard, which you can find by clicking Account in the top menu bar. At the bottom of the page you can find a list of pools that you have created that are currently open, as well as a list of pools that you have contributed to.
Step 4. Contributing to a Pool
-
To contribute to a pool you will need the specific ThorBlock pool URL. This URL will take you to the Pool page, where you can view the pool details.
-
On the Pool page of the pool you would like to contribute to, go to the Contribute section.
-
In the drop-down menu under Wallet to contribute from, select the wallet you would like to use to contribute.
Min SHA holding requirements
Make sure your wallet has at least 10k SHA (the requirement to be able to contribute) and the amount you would like to contribute including the transaction fee in VTHO.
Whitelist
Also make sure your address is whitelisted if the pool has a whitelist. You can check whether your address is on the whitelist in the Check whitelist section of the Pool page.
-
In the field under Amount to contribute, enter the amount of tokens you would like to contribute. Note that this amount includes the 1% fee. The field below will show the amount minus the fee, which is the amount of tokens that goes to the pool.
-
Read the Terms of Service and check the checkbox to accept them.
-
Click the Submit button.
-
A pop-up window from your selected wallet provider will open and ask for confirmation of the transaction that will authorize the sending of your contribution to the pool.
-
Make sure that the amount of VTHO in your wallet covers the (max) fee needed for the transaction. Do not lower the (max) fee as this may cause the transaction to be reverted.
-
If using Arkane as your wallet provider, enter the PIN you set for your Arkane wallet.
-
Click Confirm or Next.
-
If using Sync, enter your wallet password and click Sign.
-
Once you have completed these steps a message will appear that your contribution is being sent. You can check the status of your contribution transaction by clicking the link in the message.
-
Once the transaction is completed, your have successfully contributed to the pool!
-
You can view your contributions by going to your Dashboard, which you can find by clicking Account in the top menu bar. At the bottom of the page you can find a list of pools that you have contributed to.
Step 5. Managing a Pool
-
Go to Account.
-
On the Dashboard of your Account page you can find a list of the pools that you created that are currently open.
-
Select the pool you’d like to manage.
-
On the Pool page of the pool you want to manage, you can view the details of the pool, including the various addresses and the total amount that was contributed. Here you can:
-
Change the destination address. This is the address where the tokens in the pool will be transferred to Change the token address
Min SHA holding requirements
These options require the admin wallet to have at least 100k SHA at the time of pool creation.
-
Go to the Admin section. This section is only visible to the admin wallet that you opened the pool with, so make sure you have selected the correct wallet address from the correct wallet provider. In this section you can:
-
Transfer the funds in the pool (this will end the pool).
- (Optional) You can provide a hex value of the data you’d like to include in the transfer to the destination address
- Cancel the pool/project
- (Optional) Add or remove addresses to the whitelist of the pool. This option is only available if you selected the whitelist option during pool creation.